What is the car assembly line
Jul 18, 2024
Reading Volume :
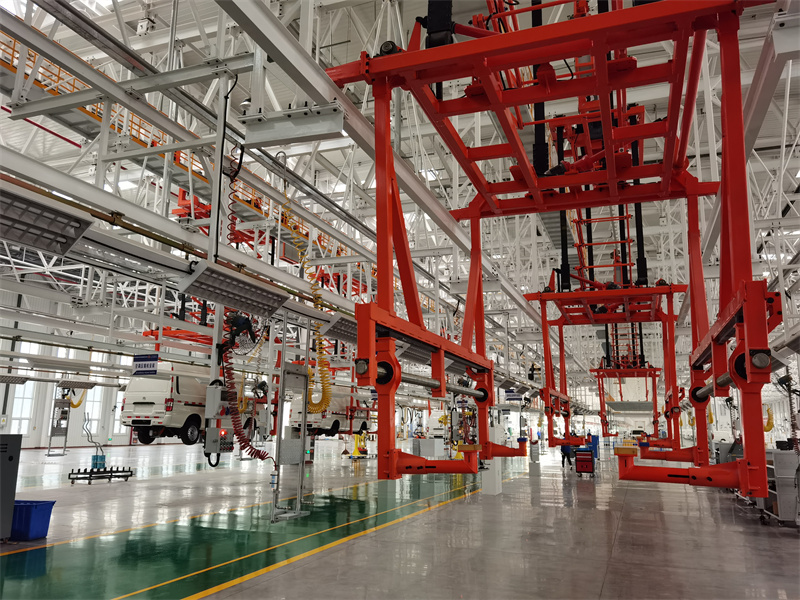
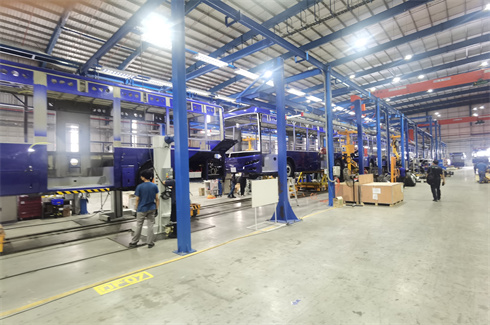
Automotive assembly line consists of the interior line, chassis line, exterior line, door line, testing line, rain line, etc. Now let's take a look at the major assembly lines!
A. Final assembly interior trim line
Bidirectional, liftable, large flatbed, realising multi-platform, flexible production and further optimizing ergonomics through free lifting and lowering of workstation heights.
B. Final assembly chassis line
Adopting modern EMS+VAC machine transport equipment, it is precisely synchronized in the assembling process to achieve accurate positioning and assembling of body and chassis, and the accuracy of assembling can reach 0.1 mm.
C. Final assembly door line
Adopting a friction drive (FDS) system, which has the advantages of no lubrication, cleanliness, and quietness compared with an ordinary chain motorized line.
D. Final assembly inspection line
Automotive four-wheel alignment equipment, speed test, headlight testing, and other equipment to test the performance of the vehicle's safety.
Vehicle Assembly Line Production Line
Step 1: After the car body is sprayed, it comes to the assembly workshop. First, the car door is removed, and then the installation process begins. The first step is done.
Step 2: Lay a sound insulation pad between the seat compartment and the engine compartment.
Step 3: Install the sunroof. A robotic arm lifts the sunroof and sends it in through the front windshield. Another worker inside the car tightens the screws at the four corners and it is installed.
Step 4: Install the car ceiling. The rear part of the ceiling is usually fixed with the help of left and right handles, and the front part is mainly fixed with the help of the sunroof.
Step 5: Install the dashboard. All the front parts of the car, including the dashboard, center console, air conditioner, glove box, etc. are assembled together.
Step 6: Install the rear suspension.
Step 7:Install the front and rear windshields. The machine will glue the glass automatically, which is more efficient than manual gluing. It can apply the glue evenly.
After that, the robot sends the glass to the installation station.
Step 8: Install interior panels.
Step 9: Install the brake pump, watering can, horn and other engine compartment parts
Step 10: Install the front and rear lights
Step 11: Install the fuel tank, fuel pipe, brake instrument and other components. Next, the self-driving platform vehicle delivers the powertrain to the final assembly line
Step 12: Install the powertrain. The platform vehicle carries the powertrain and is integrated with the vehicle body.
On the auxiliary line, there is a room dedicated to installing engines and transmissions. The transmission is on the right crane, and the engine is on the left crane. Align the transmission and engine and assemble them together. Back to the assembly line, let's continue. At the rear of the car, there are the rear subframe and rear suspension cross arm, exhaust pipe. The car body slowly descends and finally meets the powertrain. There are two workers at the front of the station. One is responsible for installing the suspension and the other is responsible for installing the claws. It isolates the vibrations generated when the engine is running and acts as a vibration mitigator.

Step 13: Install the front and rear guard bar housings. Install the guard bar shell, more and more like a car
1. Stick the car label on the work station.
2. Looking to install the lower guard.
3. Install the sealing strip of the door frame
Step 14: Install the front and rear seats. Relying on the spreader to feed the seats into the cabin and bolting them on
Step 15: Install the wheel and mussel assembly
.jpg)
Step 16: Add various types of oils and fluids.
Step 17: Install the doors.
1. Send the door to the front of the car body by the spreader.
2. Start the assembly of the car door, is completed on a separate auxiliary, first install the lock mechanism, wiring harness
3. then install the horn, window unit, glass, sealing strips, and apply the waterproof layer
4. Finally, put the interior panels, a door assembly is completed
Step 18: Inspection.
A. Final assembly interior trim line
Bidirectional, liftable, large flatbed, realising multi-platform, flexible production and further optimizing ergonomics through free lifting and lowering of workstation heights.
B. Final assembly chassis line
Adopting modern EMS+VAC machine transport equipment, it is precisely synchronized in the assembling process to achieve accurate positioning and assembling of body and chassis, and the accuracy of assembling can reach 0.1 mm.
C. Final assembly door line
Adopting a friction drive (FDS) system, which has the advantages of no lubrication, cleanliness, and quietness compared with an ordinary chain motorized line.
D. Final assembly inspection line
Automotive four-wheel alignment equipment, speed test, headlight testing, and other equipment to test the performance of the vehicle's safety.
Vehicle Assembly Line Production Line
Step 1: After the car body is sprayed, it comes to the assembly workshop. First, the car door is removed, and then the installation process begins. The first step is done.
Step 2: Lay a sound insulation pad between the seat compartment and the engine compartment.
Step 3: Install the sunroof. A robotic arm lifts the sunroof and sends it in through the front windshield. Another worker inside the car tightens the screws at the four corners and it is installed.
Step 4: Install the car ceiling. The rear part of the ceiling is usually fixed with the help of left and right handles, and the front part is mainly fixed with the help of the sunroof.
Step 5: Install the dashboard. All the front parts of the car, including the dashboard, center console, air conditioner, glove box, etc. are assembled together.
Step 6: Install the rear suspension.
Step 7:Install the front and rear windshields. The machine will glue the glass automatically, which is more efficient than manual gluing. It can apply the glue evenly.
After that, the robot sends the glass to the installation station.
Step 8: Install interior panels.
Step 9: Install the brake pump, watering can, horn and other engine compartment parts
Step 10: Install the front and rear lights
Step 11: Install the fuel tank, fuel pipe, brake instrument and other components. Next, the self-driving platform vehicle delivers the powertrain to the final assembly line
Step 12: Install the powertrain. The platform vehicle carries the powertrain and is integrated with the vehicle body.
On the auxiliary line, there is a room dedicated to installing engines and transmissions. The transmission is on the right crane, and the engine is on the left crane. Align the transmission and engine and assemble them together. Back to the assembly line, let's continue. At the rear of the car, there are the rear subframe and rear suspension cross arm, exhaust pipe. The car body slowly descends and finally meets the powertrain. There are two workers at the front of the station. One is responsible for installing the suspension and the other is responsible for installing the claws. It isolates the vibrations generated when the engine is running and acts as a vibration mitigator.

Step 13: Install the front and rear guard bar housings. Install the guard bar shell, more and more like a car
1. Stick the car label on the work station.
2. Looking to install the lower guard.
3. Install the sealing strip of the door frame
Step 14: Install the front and rear seats. Relying on the spreader to feed the seats into the cabin and bolting them on
Step 15: Install the wheel and mussel assembly
.jpg)
Step 16: Add various types of oils and fluids.
Step 17: Install the doors.
1. Send the door to the front of the car body by the spreader.
2. Start the assembly of the car door, is completed on a separate auxiliary, first install the lock mechanism, wiring harness
3. then install the horn, window unit, glass, sealing strips, and apply the waterproof layer
4. Finally, put the interior panels, a door assembly is completed
Step 18: Inspection.


